Oops! I didn’t realize I was so behind! I have completed and listed FOUR whole items since I last updated! Whew! Here we go, in order of completion:
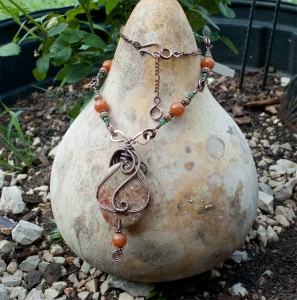
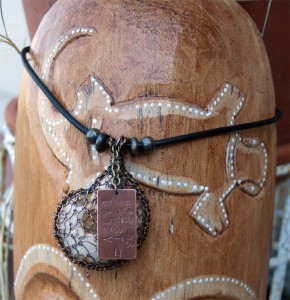
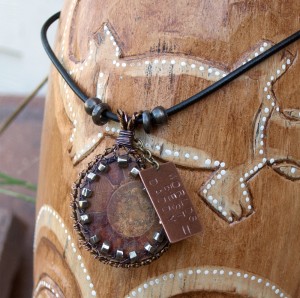
Remember that Flower on Copper pendant I made? Well, that started out as an experiment, to test out a patina technique and polyurethane sealant I was unsure of, and wanted to understand a little better before using on my sweet little cloud I have had in the works for LITERALLY months. After the patina turned out so great, I tested the poly, and seeing as that was awesome, I said “well, I might as well continue and see where this sweet little thing goes”. And thus, Flower on Copper was born. Braver now, I pushed forward with my cloud project. The Brawn and I worked together to add the patina, and after seeing how wonderfully durable it was, actually decided *against* using the poly on the cloud. My sweet little labradorite briolettes from Magpie Gemstones were surprisingly resilient when it came to the wrapping with the sterling wire. I was ready to hear that dreaded little *SNAP* as I wound the wire around that tiny tip at the top, but as it turned out, I needn’t have been so delicate! The clasp was fun to make, and as usual, I added an extension chain. I’m wondering now, given the length of the overall necklace, if it was even necessary, but meh, it gives a nice little sparkly surprise at the back of the neck, especially if the hair is worn up. The pictures, in all honesty, and despite the cliche, really, absolutely, do not do this necklace justice. There is no comparison to seeing it in person, in my ever-so-humble opinion. Here is El Nino, as listed in Mama’s Craft Room Etsy shop:
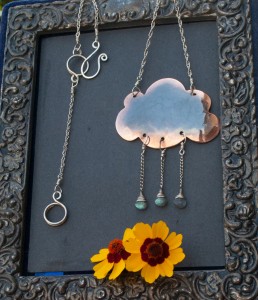
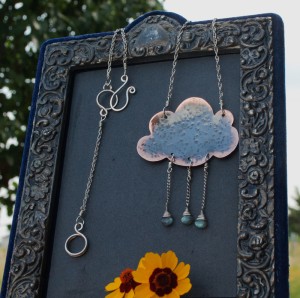
I would seriously wear this either way, since the back of the cloud is just as beautiful as the front.
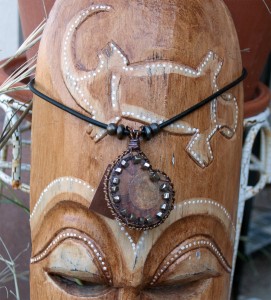
From there, I moved forward with yet another high-altitude idea. I had a few tumbled river rocks that were given to me at the cabochon wrapping class I took with Karen Meador, Ph.D, of Dreamcatcher Designs TX, and had been thinking of what wrap would bring out the natural beauty of such a simple stone. I decided to use red brass, or Nugold, as I really liked how the gold tone complimented the yellow undertones of the rock. After the general design was laid out in my head, and portrayed in wire, I decided it needed a little extra pop of color. In goes two sweet little red corral beads that I am hording! I absolutely love them, and they are making little appearances here and there lately. Once the rock was all wrapped in its neat little package, the new dilemma came about of how to hang it from a neck. I knew I wanted something a little more earthy, hippie. I had visions of vast wildflower fields before my eyes, my mom as I remember her from way back, when I was quite young-long hair loose, gauzy skirt and top… ANYway. So I felt it needed something more natural, like leather! I toyed with a five inch piece of leather until I came up with just the right look. And thus, Hippie River Rock emerged:
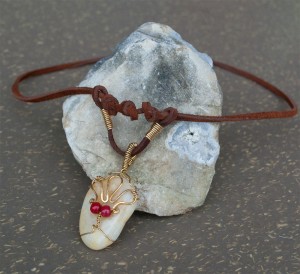
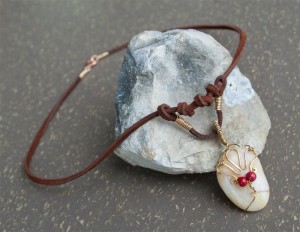
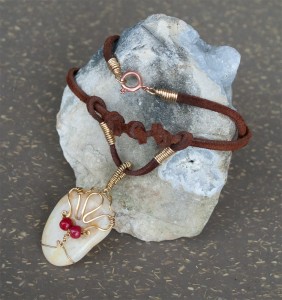
It is super sweet, and I can almost smell the patchouli when I look at it! 😉
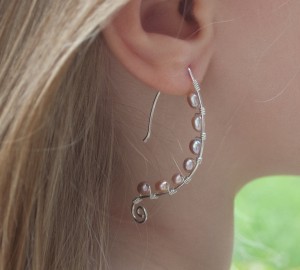
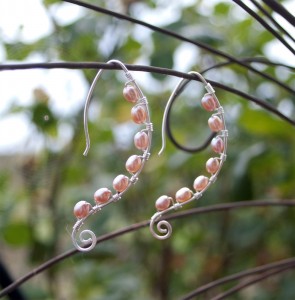
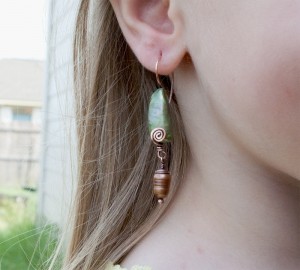
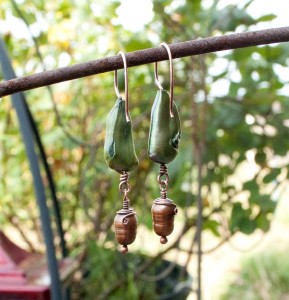
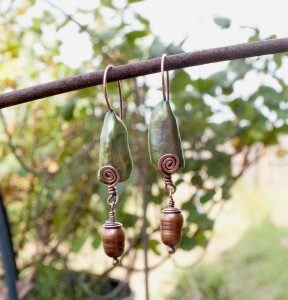
Moving on. I had two more half-finished items in the works, and decided to pick one up and get working on it. I got about 85% done, when I realized I had made a dreadful mistake, and had just rendered every second of work on it moot. UGH!!! I set it aside, lest I give in to the urge to fling it across my Craft Room. Sitting there, I toyed with strands of beads, tidy my desk a bit (not too much, because then I’d never be able to find anything again), and decided I had a dire NEEEEEEDDDD to make a pair of earrings! I prefer to call them ear wires. It was very straight forward from start to finish! I was surprised how easy I was able to bring this idea to fruition! I lined up my sweet little 4mm. sunstones beads (of course, from Magpie Gemstones!), cut two pieces of 20g copper wire to equal length, and held them both and formed them both at the same time, thus creating two equal shaped wires with very little effort! I hammered them gently, tapping the spiral flat first, and working my way up to work harden the wires so they hold their shape nicely, and with 26g copper wire, started wrapping my way up, adding the beads on the inside curve as I went up. I ended up using more beads than I thought I would, and then dipped them in patina, and buffed them to a gorgeous shine. My sweet Valerie Rose was my graceful model, and here she is, wearing Simple Sunstone:
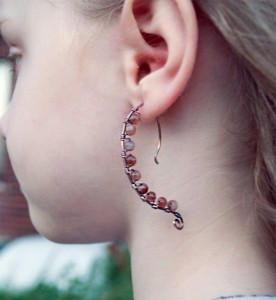
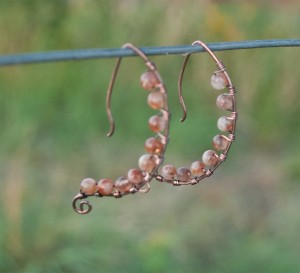
Right?! Someone said they remind them of caterpillars.. I think I have to agree.
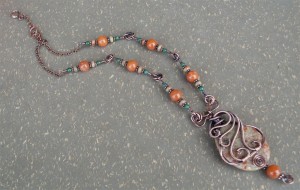
Finally, we have come to the fourth and final work I accomplished since my last post. I call it Caught In Jasper, and you can find it, of course, in Mama’s Craft Room Etsy shop! The story behind this piece is something to behold. It started out with a completely different pendant. One that has been the bane of my existence since I first made it!! I took a red banded jasper (aka red malachite) and did a great wrap on it, accenting it with a sweet, tiny dragonfly charm. When the time came to add the patina, the copper would not take it! So I thought “well, it must have a coating on it”. I scrubbed it with a wire brush-still would not take. I scrubbed it with steel wool-nadda. I sanded the hack out of it with SANDPAPER-and STILL, the copper would NOT take the patina!! OHMYGAWD! All that work, for NAUGHT! “Just leave it and don’t treat the chain” you might be saying to yourself right about now. Well, it’s not that I am that stubborn, or OCD (hush you) but I had already made the gorgeous chain that was going to go with it, and had been waiting for the chain to be done, so I could treat it all at one time. So now, my chain looked absolutely perfect, and my pendant Did. Not. Match. Ok, deep breath. I’ll just remake it. Now that I’ve done it once, it’ll be a breeze to redo, right? Sure. Except I didn’t have any wire in the correct gauge that was not the coated stuff! So I called the first place I could think of-Legendary Beads on South Lamar. The conversation went something like this:
“Hi! I’m looking for copper wire in this gauge, that is bare copper, completely untreated, and NOT non-tarnish. Do you have any?”
“Uh.. let me looooooookkkkk… yes! We DO have it, and it’s the very. last. package”, dude enthusiastically informs me.
“Are you *sure* it is NOT the non-tarnish wire? That’s the most important thing..”
“Well.. I’m pretty sure.. *package rustling* In fact! I see an anti-tarnish strip in there.. oh! and it does have some tarnish on it.”
“Great! It sounds like that’s what I need. Can you hold it for me til this afternoon, say around 5pm?”
“Sure, what’s your name? I’ll label it and put it behind the counter.”
“Well, my husband will pick it up-his name is Tim, and he’s hard to miss-he wears a kilt.”
*Crickets* “Ok… sure. We will have it here for you.”
Fast forward to Tim getting home and low and behold, the wire was indeed tarnishable. In fact, it was so tarnished, it was flaking off like a powder!!! I decided to clean it after working it, but it was not only tarnished, but seemed to be a slightly smaller gauge and just a little more than half-hard! This will never do. The Brawn (aka the Muscle) annealed it for me, and I proceeded to create a beautiful new wrap. When I was satisfied with it, as much as I could be since the wire was a bit smaller, I decided I needed to tumble the heck out of it to work harden. After about three hours tumbling in steel shot, my wrap was perfectly hardened. And my stone was ruined. I think I might have said a few choice words, stomped my feet, and maybe even shed a few tears. The Brawn said he might be able to buff it up for me without having to take it out of the wrap. And so, after a good 35 minutes work, he produces a beautifully polished stone in its wrap! However, he took a torch to part of the wrap to remove the stones since there simply was no other way to get it all. And I was right back to where I was, pre-tumble. I had no way to harden this thing without harming the stone, so I said the hell with it. And the chain sat waiting for the perfect pendant ever since.
Last weekend, we went on our annual “Kick off the summer” camping trip to Kerrville, and on the way there, passed a little Rock Shop just outside Dripping Springs. All weekend long I had been fiending over this place, and talking about it to whomever would listen, because I had FULL intentions of stopping there on our way home. Sure enough, I found a few treasures there! L, the Brawn and I walked all around that little shop, leaving no stone unturned (harhar). I found a sweet freeform red jasper that I knew in my heart of hearts would be perfect for SOMEthing. When I sat down with it, my eyes settled on the chain, waiting in its dish on my desk and I had my eureka moment. I set to wrapping the rock, taking advantage of its nifty little crevices and curves, with just enough wire to hold it securely, while still displaying the beauty of the stone. Finally, my sweet chain had its purpose, and Caught In Jasper was here:
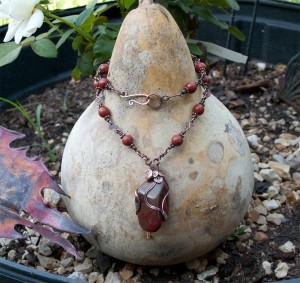

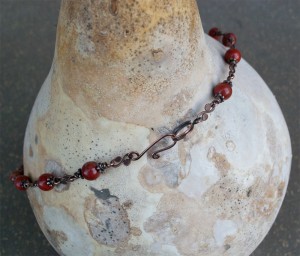
I love this. The size and weight are perfect for me. I think I might wear this one out and about, to try and attract new customers! I was advised by a lady in one of my groups to wear it to galleries as a way of advertising. I think that might be something I look into..
That’s all I have for now, dear readers. I have a few more in the works and am SO excited about them. But, you’ll have to wait. For in the morning, we party! Just kidding. But we will be busy having fun, and all work and no play makes Mama’s Craft Room pretty darn boring. =^..^=
