Category Archives: Mama’s Craft Room

TDF day 13 and Mini Challenge!

TDF day 13 and Mini Challenge!

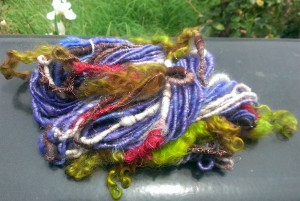
On track for TDF-though I did have to modify my goal. Originally, I hoped to fill a bobbin a day. However, spinning very fine takes FOOOOOOOOORRRRRRRRRRREEEEEEVVVEEEERRRRRRRR!! So, I decided that as long as I spin steadily daily, then I’m good. Our little Facebook group was presented with a mini-challenge by our awesome hostess-to look up the number one hit song on the day you were born, and spin a yarn to represent it. Luckily, I just missed “Let’s Get It On” by Marvin Gaye, and had “Delta Dawn” by Helen Reddy.

At first, I thought I would end up with a crazy, wacky yarn that would be one of those things that you keep and have just to say you did it. But after listening, really listening to the song over and over.. (yes, the kids all asked over the course of two days “is that your new favourite song, mama?”) I felt sad. I pictured her walking barefoot down Main Street, peering into quintessential small town store-fronts, with mannequins on display wearing high fashion from decades past, shops with sticky candy melting in the sun shining through the window, the drug store with empty seats at the soda fountain.. She wears a lacy, crochet dress that was once white, now tattered at the edges and a charming shade of ivory. Her hair is sun bleached “yellow” blonde, curling wildly around her head, silver streaks glinting in the sun her only betrayal of her true age. A faded rose pinned to the front of her dress with one of those tiny brass safety pins, drooping sideways, but petals and leaves still intact. Her suitcase is a brown cracked leather with shiny brassy clasps that she keeps clean and polished. But it’s her eyes, blue and wild, that stop you in your tracks and make you wonder: what lost love made this beautiful girl lose her mind..

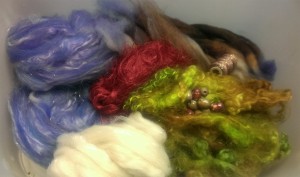
I decided that I needed to dye! Shocking, I know. I think dyeing is one of my most favourite part of the fiber arts process. I selected squishy soft Cormo for the base fiber, and knew I needed a handful of Henry’s locks as an add-in.
locks
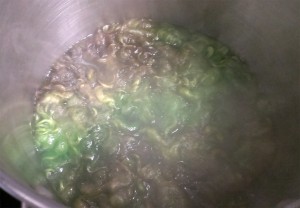
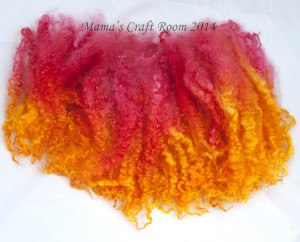
Ooooh.. steamy. These are the locks as I kettle dyed them. I LOVE how silky and shiny Henry’s locks are!! And the colors came out *exactly as I hoped. I didn’t take pics of the Cormo as I dyed it-I worked too fast to think about it when the baby was quiet for awhile. After everything was dried, I decided to separate the cormo into color segments-the brown was pulled out and set aside, and the blue/violet was blended with hand painted silk and silvery angelina with my awesome two-pitch hand combs that the Muscle made me. The blue/violets are for her eyes, the silver her hair, the silk for her beauty.
deltadawningrediants

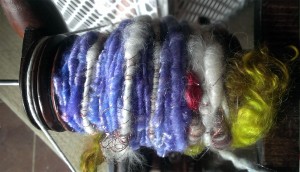
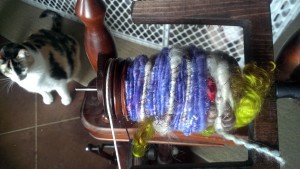
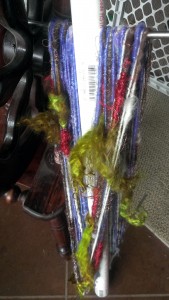
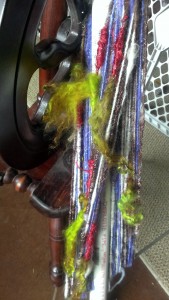
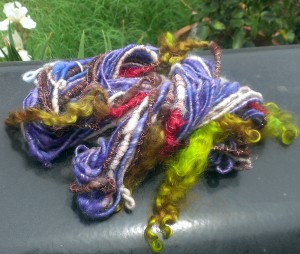
I knew the locks would be the “faded rose”, along with a deep dark red silk thrum. The locks would be tail spun, and the silk thrum wildly added right after. I used a natural colored blend of merino/alpaca/tencel to transition from the blue/violet to the browns of her cracked leather suitcase. Throughout, I had metallic thread autowrap, except for over the blues to not take away from the silver angelina. This is my second ever core-spun yarn, and first real “art” yarn. My tiny bobbins/wheel and flyer to not allow for much and it was a labor of love as I struggled to make it happen! Stopping and starting often to uncatch the fibers on the hooks, on the orifice, on each other! In the end though, I am SO freaking happy with the results. This will be something for me that I will cherish forever.
deltadawn qualitycontrol
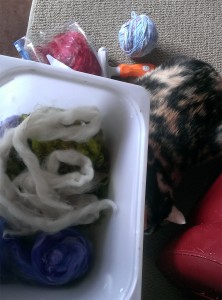
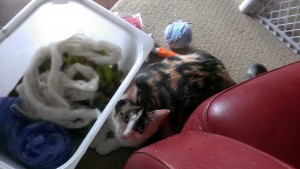
That’s my Quality Control inspector. She is also my sneaky little fiber thief! I could not for the life of me figure out how my fibers kept ending up scattered outside my bucket when nobody was around. The kids said it was PollyAnna, but I didn’t believe it. Then I caught her.
sneakyfiberthief helper

I didn’t get a ton of yardage, but I’m ok with that. My eyes were far bigger than my bobbin. This is what my wheel could handle. 24 yards. WOOt!
I didn’t use the vintage wooden beads yet-I will though when I turn the yarn into a wearable-they just go too well with it.
deltadawn2 deltadawn2a

I am glad for mini-challenges, for meeting like-minded people who pose challenges to strangers and friends alike to help them broaden their minds and experiences, for no reason other than to wish for all to have fun, and for how through the grace of the internet, we can share in each others’ successes, failures, joys and losses, holding each other up through it all. Til next time, hug someone you love. =^..^=

dd4dd3


Jewelry, Fiber and TDF, Oh My!

Jewelry, Fiber and TDF, Oh My!

I promise, I haven’t been slacking around. I have actually done a few things since I’ve last posted!! I’ve been wanting to post for quite some time now, but I get sidetracked every time I sit down for five seconds!
I will keep this post short. I’m going to post pictures and brief captions, plus I really, really want to talk about my very first ever Tour De Fleece! *SO EXCITED*!!!

1377071_770368699642191_1322396747_n10006613_811936088818785_4889300607303001932_n
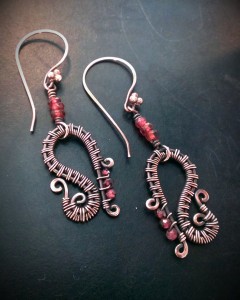
Who would have thought that the image on the left would end up the picture on the right? It was an experiment, and in the end, I followed where they went and though unexpected, really like them. Grade A garnets on woven copper, they are surprisingly light weight and are just a hair over two inches long from the top of the ear wires to the bottom of that lowest little curl.

grapegarnets2
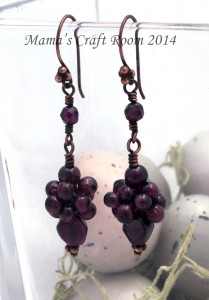
Little garnet clusters, these make me think of grapes. Nice weight to them without being horribly heavy, they measure just a tad over two inches from top of the ear wires to the very bottom of the dangle.

LushGarden10308095_797831710229223_35612129862889700_n
I made this AYE-mazing yarn that I just LOVE, and called Lush Garden, and learned a hard lesson-never dye less than eight ounces. This is a small skein, so I am kicking myself for not dyeing more at the time. It’s a little hard to repeat spontaneous hand-painting! This is so soft, semi-worsted merino/alpaca/tencel, next to skin soft.

10426660_808365402509187_323041907378061261_n 10455917_809248449087549_734469287241035_n
I have started knitting up my new series of Mountain Men hats. Earthy tones, thick and warm, the gents on the Muscle’s forums expressed great interest in them!

teesBFLlocks
We attended the Yellow Rose Fiber Fiesta this year!! I was luck to have been joined by some of my favorite framily people and V and I snapped up some raw long locks that were being sold by a nice lady named Tracy Ross of South Texas Angora Goats. I opted for the 50% teeswater/BFL cross locks and V brought home some awesome 50% teeswater/Wenslydale locks. We had a Fiber Day here at the Ranch, and together skirted/washed a good half pound of locks. V hasn’t dyed hers yet, but I couldn’t wait! I laid them out in a pan and dyed them in the oven using Jacquard Acid dyes I painted on. Success!! These locks are an average of nine inches, with some being around 6 but most closer to 9-10.

henryslocks
Now these are mohair locks from my wether, Henry. I love that goat. He is two years old and has the silky soft lustrous locks of a kid. I haven’t done any tail or lock spinning yet-so I decided to practice with Henry’s locks before diving into the teeswater/BFL locks. And OH MYYYYYYYYY!!! I am just blown away at how silky these are!!

vickysrovingBFL
V and I both found some wonderful BFL roving! We dyed together, V’s first time! (Hers on the left) I was so proud of her! I also gave her a drop spindle demo (so glad the Muscle has handy like that-he whipped one up right quick while we did the fiber prep!) I can’t wait to see it all spun up!

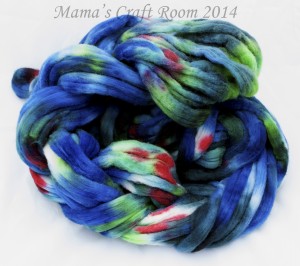
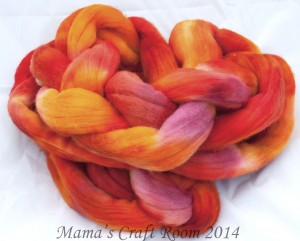
cormoblue cormohibiscus
So… all this dyeing-what am I leading up to? If you guessed something to do with the 2014 Tour de Fleece, you guessed right! I had heard of this last year, but I felt I didn’t know enough, didn’t have the skills or experience to join the Big Kids in this event. I still feel like I lack the skills, experience and really have no idea what I’m doing half the time, though I fake it well-I decided I would join this year! I teamed up with an awesome group-Team Nevermore- and they are an awesome bunch. Totally My Kind Of People. They all seem like a bunch of people I’d love hanging out with In Real Life. Why does the world have to be so big, scattering birds of a feather so far from each other? Anyhoo-Tour de Fleece is a spinning event that coincides with the Tour de France-basically, you spin every day that they riders ride. Makes sense, right? Different groups have their own little “challenges” or goals within them, and everyone is encouraged to have their own goals-mine is to fill a bobbin a day! With my wimpy small bobbins, hopefully that will be a goal easily achieved. At the end of the Tour, I hope to have some wonderfully squishy soft amazing skeins of yarn for sale, or to be knit up in a variety of sellables. Here’s the official logo:

image courtesy of StarAthena, http://keeponknittinginthefreeworld.blogspot.com

image courtesy of StarAthena, http://keeponknittinginthefreeworld.blogspot.com

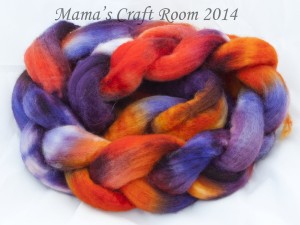
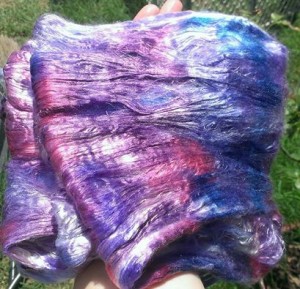
I forgot to mention my escapades with silk brick. If you haven’t yet reached the conclusion-I absolutely love dyeing fibers. So I decided silk bricks werew next on my list. Silk bricks are approximately four ounce rolls of 100% A grade mulberry silk. I cannot even begin to describe how silky (heh.. silk is silky, go figure………..) this stuff is, and how incredibly soft and SHINY!!! After a false start, I was finally able to dye a brick a beautiful swirly mix of blues and purples. My first attempt was a little…. sad. I tortured the poor silk, causing it to form a texture on itself-while is is still incredibly, wonderfully soft and even shiny, it isn’t as smooth as it should be. So that has become an add-in for blending with other fibers.
silkbrick1922450_10152120867856470_7118092103017931553_n OrangeCormoSilk
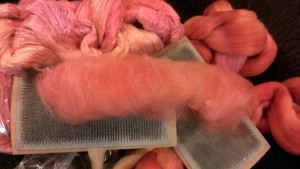
See? Shiny! I took some of the abused silk and blended it with Cormo wool (yummy, next to skin soft!) blending with my hand cards first, making a little rolag. Then I blended it using my combs the Muscle made for me, and made a little mini-batt. I honestly think I prefer the mini-batt to the rolags. I plan to do some core-spinning with these! The blue/purpley brick however will not be blended. If I don’t sell it as is, I will be spinning the silk alone. Have I mentioned how hard it is to photograph bright colors without having them look crazy over saturated or just plain washed out?? No happy balance here, I’m afraid. I got the pics as close as I could to reality.

Well, I think that’s all for now. Whew!!! I know I’ve done a few more things-camping, more jewelry, more yarns spun, but these are the highlights and I really felt the need to document them! I will be posting more during TDF to share my little victories, and I have more jewelry in the works-stay tuned! Til then, don’t forget to stop and smell the roses… =^..^=
10441447_10152088609956470_6046024947018259674_n 10378550_10152095246811470_5714804776836226901_n IMAG1440_1 IMAG144110423276_10152088605371470_2146529470069426386_n
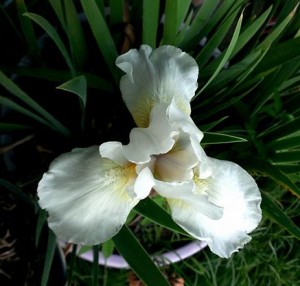
And Bearded Iris.

BSBP #8!!

BSBP #8!!

Whew! This post is LONG overdue! It has been crazy busy around here with shearing, lambing, and just plain old regular household and farming duties, that I haven’t had a chance til now to sit down and write about the upcoming 8th Annual Bead Soup Blog Party, hosted by the amazing and wonderful Lori Anderson of Pretty Things Blog!! Lori is such a strong, inspirational woman, and despite the hardships of slowly healing from devastating health problems, she still manages to trudge on! She has an amazingly supportive husband, and a wonderfully helpful, handsome young man of a son, and together with the support of her friends in the online community, she bravely faces her illness head on, and doesn’t let it change what makes Lori, well, LORI! Please take a moment with me, and send some warm thoughts out her way…
http://www.dreamstime.com/royalty-free-stock-photos-cherry-pie-ala-mode-image28116498

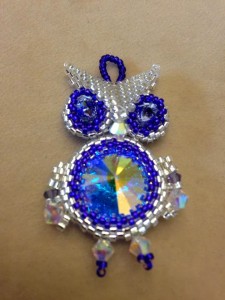
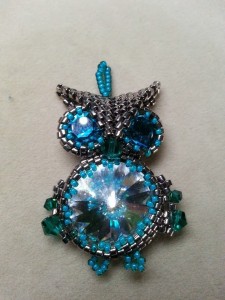
This is my third year participating in the BSBP, and I’m excited! I have been partnered with wonderful artist, Heather Richter of Desert Jewelry Designs. Heather creates all sorts of beautiful jewelry pieces, and is an awesome seed bead artist! I just love her cute little owls!!
owlowl2

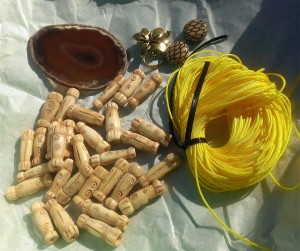
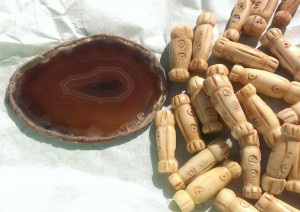
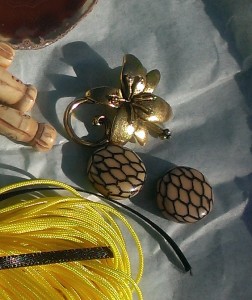
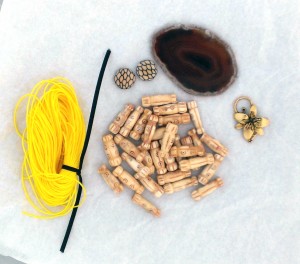
I may not work with seed beads much, if ever, but I was very excited to learn that Heather is also into mixed media. I hope she enjoys the soup I sent and cannot wait to see what she creates with it! Here’s the soup I received from Heather:
soup2focalsoupUntitled-1soup5

A sweet, natural agate slice, bone beads, brass flower toggle clasp, a pair of glass beads and beading cord! I knew immediately what I was going to do! I have already started working, and am looking forward to our reveal date of May 3rd! Make sure you check back then to see what I have come up with! Til then, keep calm, and enjoy life! =^..^=

Fluffy Tush!

Fluffy Tush!

Lately, I’ve been researching cloth diapers. I have found a plethora of information-an OVERLOAD in fact! They sure have come a LONG way since I last cloth-diapered!! But what an adorable, fun way to provide absolute necessary care for your little one, and yet do a part in keeping your carbon footprint just that much smaller. I mean, almost everyone uses diapers, right? At some point in time of their child’s life. Even those practicing elimination communication need some type of waste collection system for when they are traveling about or have to spend the day away from home or acceptable facilities. The last time I cloth diapered, I made my own diapers then as well. I took yards and yards of flannel fabric, cut and plied them to form a thicker absorbent padding where it was needed most, keeping the side trimmer and more custom fitted to keep baby more comfortable, and to fit better under clothes. I used simple, pull up style waterproof pants, aka “plastic pants” though they weren’t plastic-nylon maybe? Some type of thing vinyl? I’m really not sure! The entire “investment” probably cost me around $50 total for the first year. Fast forward many years, and now you can find diapers with every imaginable cartoon character on the butt, ruffles, and all sorts of printed patterns. There are “All in one” or “AIO” diapers that are just as trim and just as absorbent as national name brand disposables! There are “plastic pants” that open and close with either snaps or hook and loop tape, with some being “one size fits all” by utilizing snaps in the front to scrunch it up smaller, or unsnap to make it bigger and longer. Some have pockets you “stuff” with a “doubler” or “soaker”, and some are a combo of a thinner diaper with a pocket for stuffing when you need extra absorbancy such as overnight. I could go on and on about the intricacies and massive variety of options, but I won’t bore you any longer.

I chose microfiber terry as my absorbent part. This is one of the most important aspects of cloth diapering. If it isn’t absorbent, then what’s the use? Another main feature that I feel is very important is a layer of wicking, stay dry material. I have two options for that-microsuede, and “Minky” fabric. Both wick moisture and wetness quickly away from baby’s skin, and yet to the touch, stay relatively “dry”. In disposable diapers these days, there is an additive-a polymer called sodium polyarcrylate- that solidifies wetness into a gel of sorts and by doing so, hold wetness in the core of the diaper, preventing it from flowing back against baby’s skin. And finally, the cute outer part. I went with PUL fabric-polyurethane laminate-as it is both breathable AND waterproof! Some people think PUL isn’t a breathable fabric, and doesn’t allow for enough air to skin, but I have seen in person how it works, and feel that if baby’s bottom needs more air than that, then naked time will be scheduled. (If you’d like to see a video a mom did to investigate and compare the “breathability” of PUL versus disposables, click here: http://www.youtube.com/watch?v=IKpCcUznbaI )

First I came up with a pattern, based off a sweet little AIO diaper made and sold by a mom. Unfortunately, she has recently retired her business due to health issues, and I can no longer find Blissful Booty diapers, but if you are in the market for some, and come across an authorized retailer that still carries them, lucky you!

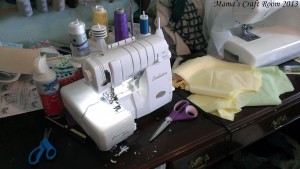
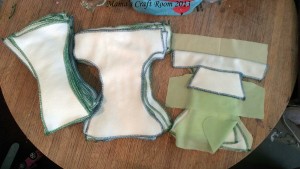
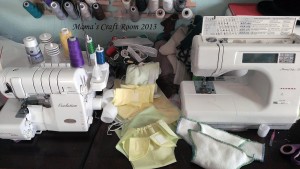
I cut out a dozen diapers. One dozen layers of microsuede, of microfiber terry, and of PUL. Then I shaped and cut out the extra inner absorbent part for down the middle-two layers per diaper of the same microfiber terry. I have a fabulous serger-the Baby Lock Evolution, and it is a work horse. I serged the edges of my microfiber terry parts, layering the soaker in a two layer separate part while I pondered assembly.

(Click on any picture to see it full-sized)

IMAG3919

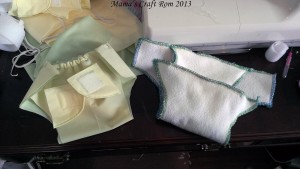
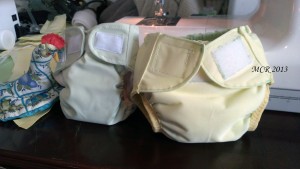
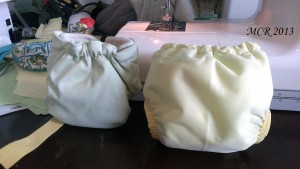
IMAG3920 Left to right- two layer soaker, extra layer of absorbent microfiber terry, and then the order I decided to assemble them-Yellow PUL outer cover, then full size microfiber terry, soaker, then microsuede wicking fabric.

I would add the tabs for the hook tape separately. I fumbled a bit at this point, experimenting with the exact method of execution of assembly. I had the order in which they were to go, but not the “what attaches to what” part down. I also wanted to add elastic inner gussets, and experimented with one microsuede liner first. It was a no-go, as I had not compensated for the fabric that would be taken up in the width of the center part of the liner, making it too narrow. I set that one aside, because I was too excited to get the first fully completed diaper done, and didn’t want to fiddle with the seam ripper at that time.

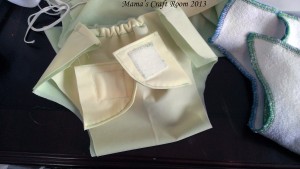
Next, I sewed the soaker to the bigger microfiber terry. That also was not helpful. I found that overall, I made the soakers and extra layer too long for the final assembly. I have to shorten them to fit between the seam allowance of the PUL and microsuede wicking layer. I then attached the PUL and the microsuede together at the very front edge and the very back, made a little casing for elastic, and secured the elastic in place. Note that the sides are all yet completely open.  Then I made the tabs that the hook tape will go on, putting one little tab of loop tape on the *outside* of one tab (for very skinny babies, so the tabs can overlap and still close securely), and sewed the loop band across the outer front.
IMAG3925 IMAG3923 IMAG3922

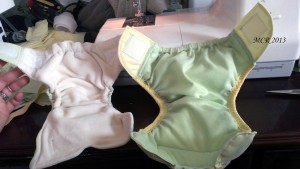
I sandwiched the tabs in the opening at the back, tucking the raw edges of the diaper part in and top stitching. Then I was ready for the fold over elastic (or FOE from here on out). I started at the edge where the added tab connects to the diaper, and brought it forward to about an inch and a half from the top front edge, stretching as I went. Then I was done! The little celery green diaper is my Blissful Booty model in newborn size that I used to make my pattern.
IMAG3946IMAG3949  IMAG3947

My diaper is slightly bigger-mostly in thickness, which makes it seem wider, but it really isn’t! I am very happy with it, and have now made a few more, and I have changed up my “pattern” a bit. I will share that when I get a few of the diapers made with the new pattern. I added a double gusset from the PUL fabric, as well as more leak protection by having the PUL fold over an inch into the waist band. I’m excited about it! In the meantime, here’s what I have learned:
1. Do not cut out a dozen without trying ONE first!!! I now have 10 microfiber diaper shapes that will be turned into fitted diapers (that will use a separate cover). The diaper was too bulky with the extra layer.
2. Measure twice, cut once!!
3. If not using a pattern someone else came up with, at least read their *order* of steps! It will save a lot of confusion and time in the long run.

Til next time my friends, craft on! =^..^=


No Need For An Intervention!

No Need For An Intervention!

Just when my loved ones were starting to worry about me, I joined the Bead Hoarders Blog Hop, hosted by Lori Anderson of Pretty Things Blog. When Lori first came up with the idea, I thought how brilliant it was to motivate us all to start using pieces we had been hoarding for weeks, months and ahem.. years! Besides beads, ,my stash includes several (TONS) of cabochons: larger focal pieces that do not have a hole drilled through them. Technically, I suppose, they aren’t “beads”, but they are a jewelry component that I am hoarding! Leading up to this blog hop, I started forcing myself to start using them-and many beads I had been hoarding saving, with happy results. Some I have shared already with fellow jewelry artists, such as this necklace I  made, using dyed bamboo coral and copper beads, sodalite disks and a large focal bead I enameled myself, all hung from a hand forged U shape and strung into super soft leather lacing:
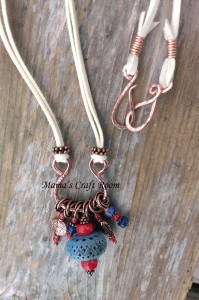
CoralCopperEnamelDanglesSince I LOVE LOVE the bamboo coral, I have been terribly stingy with it!! I suppose I still am, considering how little I used it, but the point is, I DID use it! I have a LOT of solid copper beads, spacers and jump rings, and since I got such a fantastic deal on them, I have been terrified of wasting them using them all up-and therefore have been avoiding using them at all. The same can be said for the sodalite rondelles-a great deal on the single strand, they are great quality, and therefore, if I use them, I won’t have any more like them-makes sense, right??


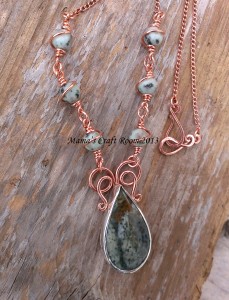
Another necklace I made was one of my first soldered bezel settings. Again, I started by choosing my focal, in this case, a cabochon I have been holding onto for awhile now, and found coordinating beads in my stash. AGAIN, these beads are some that I “got a great deal on” and therefore reluctant to “use them up”. RockyButteThe cabochon is a sweet Rocky Butte picture jasper, and I accented the necklace with sesame jasper beads I have had for YEARS. I didn’t need to use many, since I wanted the focal to stand out-nature is an amazing artist!


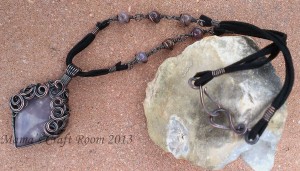
Sometimes, it’s hard to get over a ”creative block”. Writers have long claimed ownership of such blocks by dubbing them “writer’s block”. However, being on both sides of that argument since I write AND craft, I am officially changing the diagnosis to “creativity block”. I suffered this affliction in the midst of trying to force my way through my hoard treasure, and decided I would look for inspiration from some of my favorite jewelry artists, Szarka. I had always been intrigued by her style and design, and her “Kaos” wraps just boggled my mind. I selected a large cabochon-a Burro Creek agate that I LOVE the shape and color of, and sat down one day to make my way through my block. I sketched out an idea, selected my wire, and set off. After getting 80% of the wrapping done, I realized I had used wire that was too thick of a gauge to accomplish the look I wanted. With a heavy sigh, I wielded my flush cutters and with a curse, cut all the work off that I had done. I was now back to square one. I had only spent about two hours working on it so far, so no big deal, right? -_-
It was all good though, because I already had the design in mind, and that was just a practice run. I was able to use one gauge smaller, and it was just what I needed. I had it 90% done in just about an hour this time around. But then, the unthinkable happened. I asked for constructive criticism. It sat on my bench for over a week after that while I pondered what steps to take next with it. I had been so excited about it, but now I knew there was something “wrong” with it, that I was trying to NOT see until it was pointed out to me. If others could see it, then it’s real, right?? Finally, I was ready to tackle this once again. I was extremely happy with the end result. I used more leather lace, this time in black, and wrapped some sweet agate beads (yes, you guessed it, that I had been SAVING because I got a GREAT deal on them!) to use in the necklace, and my end result is my Swirly Whirly Burro Creek necklace. SwirlyWhirlyBurroCreek2


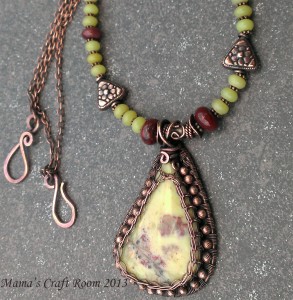
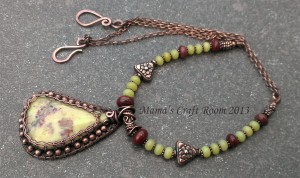
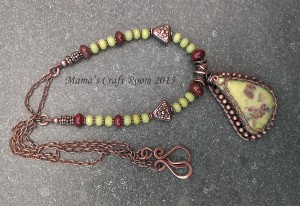
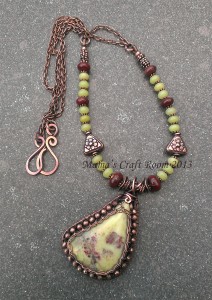
Now for the piece that I saved for my Blog Hop reveal. This cabochon is a sweet Serpentine that I snapped up in a Great Deal. To accent the cabochon, I chose little copper beads I’ve been *ahem* saving. For the necklace, out came the Great Deals once again! I selected some beads that I really haven’t had *that* long, and some I….. have. Mookaite, New Jade (aka serpentine), more copper beads and copper spacers. I am thrilled with the result!
serpentineinvk9 serpentineinvkC serpentineinvkB serpentineinvk8
First I created a viking knit bezel to hold the stone. I wanted more wire work around it, so I decided I needed to add some woven wire work. As I did that, I incorporated the little copper beads around the outer edge. I strung the necklace onto beading wire, but decided I didn’t want to add more weight, so finished it in a double strand of chain on either side. I created my own “French wire” using tiny copper coils over the beading wire where it attached to the hand made copper jump rings attaching the chains.  (If you click on the pictures, you will see them larger!) I finished it off with a hand made clasp. The yellow beads in the necklace match the base color of the cabochon perfectly, but for some reason, on the tile I used for a backdrop, it gives them a green tinge. They are actually soft yellow.

I have thoroughly enjoyed this Blog Hop! Many thanks to our hostess, Lori Anderson, and please stop by my fellow hoarders’ blogs and check out what they’ve come up with during this very therapeutic exercise:
1.  Lori Anderson, Pretty Things
2. Nancy Dale, NEDBeads
3. Roxanne Mendoza, Roxi Designs
4.  Melissa Trudinger, beadrecipes
5.  Rana Lea, Rana Lea Designs
6.  Perri Jackson, Shaktipaj Designs
7.  Rita Avila, Jewel School Friends
8.  Linda Anderson, From the Bead Board
10.  Erin Guest, Renlish11.  Joan Williams, lilruby jewelry
12. Diane Hawkey, Diane Hawkey
13.  Jo-Ann Woolverton, It’s a Beadiful Creation
14.  Sue Kennedy, SueBeads
15.  Lisa Cone, Inspired Adornments
16.  Kari Asbury, Hippie Chick Design
17.  Nichole Byers, Nichole Byers
18.  Lori Jean Poppe, Adventures in Creativity
19.  Linda Landig, Linda’s Bead Blog and Meanderings
20.  Lori Schneider, Bead Addict21.  Molly Alexander, Beautifully Broken Me
22. Cece Cormier, The Beading Yogini
23.  Niki Sayers, Silver Nik Nats
24.  Elsie Deliz-Fonseca, Eliz-Eliz and All That Craft
25.  Amber Dawn, Inventive Soul
26.  Heather Powers, Humblebeads
27.  Sarah Goode, Pookledo
28.  Monique Urquhart, A Half-Baked Notion
29.  JJ Jacobs, Coming Abstractions
30.  Cheri Reed, Creative Designs by Cheri

31.  Robyn, Museiddity
32.  Catherine King, Catherine’s Musings
33.  Jacquie, Bead Gypsy
34.  Janet McDonald, Singing Woods
35. Kay Thomerson, Kayz Kreations
36.  Tanty Sri Hartanti, TJewellicious by Tanti
37.  Hannah Rosner, Good River Valley
38.  Rochelle Brisson, A Creative Chelle
39.  Nelly May, Smelly Nelly
40.  Skylar Bre’z, Brising Beads

41.  Beti Horvath, Stringing Fool
42.  Christie Murrow, Charis Designs
43.  Leanne Loftus, First Impression Design
44.  Valerie Norton, Hot Art
45.  Judy Riggs, Rigglettes
46.  Crystal Thain, Here Bead Dragons
47.  Terry Carter,  Tapping Flamingo
48.  Sue, Mid-Life Great Expectations
49.  Nan Smith, Wired Nan
50.  Miranda Ackerley, MirandAck Arts

51.  Marie Covert, Creating Interest
52.  D’Arsie Manzella, This Here Now, Mamacita
53.  Stephanie Haussler, Pixybug Designs
54.  Lori Bergmann, Lori Bergmann Design
55.  Johanna Nunez, The Lovely One Design
56.  Mary Govaars, MLH Jewelry Designs
57.  Becky Pancake, Becky Pancake Bead Designs
58.  Alicia Marinache, All the Pretty Things
59.  Debbie Rasmussen, A Little of This, A Little of That
60.  Nat, Grubbi Ceramics

61.  Marjorie Savill Linthwaite, Bennu Bird Rising
62.  Cheryl McCloud, One Thing Leads to Another
63.  Heather Otto, The Crafthopper <<<<<<<<<<<<YOU ARE HERE!
64.  Candida Castleberry, Spun Sugar Beadworks
66.  JuLee Wolfe, The Polymer Penguin
67.  Ginger Bishop, Lil Mummy Likes
68.  Karen Mitchell, Over the Moon Design
69.  Jeannie Dukic, Jeannie’s Blog
70.  Dini Bruinsma, Angaza by Changes

71.  Birgitta Lejonklou, Create With Spirit
72.  Shalini Austin, Jewellery by Shalini
73.  Jayne Capps, Mama’s Got to Doodle
74.  Ile Ruzza, Ilenia’s Unique Beaded Jewelry
76.  Annita Wilson, AW Jewelry 
77.  Sherri Stokey, Knot Just Macrame
78.  Hannah Trost, PZ Designs
79.  Linda Inhelder, Must Haves Jewelry
80.  Miri Agassi, Beadwork

81.  Hope Smitherman, Crafty Hope
82.  Dyanne Cantrell, Dee-Liteful Jewelry Creations
83.  Susan Bowie, Susan Nelson Bowie
84.  Megan Milliken, MaeMaeMills
85.  Menka Gupta, Menka’s Jewelry
86.  Ambra Gostoli, Chic and Frog
87.  Lori Lochner, Bloghner
88.  Gerda Jurimae, Gerda’s Crafts Blog
89.  Susan, Mistheword
90.  MaryLou Holvenstot, MaryLou’s time2cre8

91.  Mary Shannon Hicks, falling into the sky
92.  Karin King, The Sparklie Things Blog
93.  Christa Murphy, Adventures of One Beady Woman
94.  Jenny Davie-Reazor, Jenny Davies-Reazor
95.  Donetta Farrington, Simply Gorgeous
96.  Mallory Hoffman, Rosebud 101 – For the Love of Beads
97.  Danielle Kelley, Imbue the Muse
98.  Kym Hunter, Kym Hunter Designs
99.  Dolores Rami, CraftyD’s Creations
100.  Marcia Dunne, 13 Alternatives

101.  Marlene Cupo, Amazing Designs
102.  Emma Todd, A Polymer Penchant
103.  Wendy Holder, Jewelry by WendyLea
104.  Michelle Escano, The Cabby Crafter
105.  Louise Glazier, Lily and Jasmine Treasures
106.  Dana Hickey, Wind Dancer Studios
107.  Lennis Carter, windbent
108.  Anne Betenson, Crystal River Beads
109.  Audrey Belanger,  Dreams of an Absolution
110.  Lisa Stukel, Carefree Jewelry by Lisa

111.  Janine Lucas, Travel Stories
112.  Claire Lockwood, Something to Do With Your Hands
113.  Kathy Engstrom, Catherine’s Dreams
114.  Paula Hisel, Simply Beadiful
115.  Karla Morgan, Texas Pepper Jams
116.  Mischelle Fanucchi, Micheladas Musings
117.  Kim, Cianci Blue
118.  Linda Sadler, Ida Louise Jewelry
119.  Karen, Spokalulu
120.  Jennifer LaVite, Dry Gulch Bead and Jewelry

121.  Andrea Glick-Zenith, ZenithJade Creations
122.  Karen Martinez, Fairies Market
123.  Robin Reed, Artistry HCBD
124.  Amy Bright, LABweorc
125.  Jasvanti Patel, Jewels by Jasvanti
126.  Tammie Everly, TTE Designs
127.  Karin Slaton, Backstory Beads
128.  Natalie Moten, Running Out of Thread
129.  Sharyl McMillian-Nelson, Sharyl’s Jewelry & Reflections
130.  Jenny Kyrlach, Wonder and Whimsy

131.  LiliKrist, Handmade by LilK
132.  Jessica Klaaren, The Truth Space
133.  Cynthia Abner, Created Treasures
134.  Beth Emery, Stories by Indigo Heart
135.  Heather Davis, Blissful Garden Beads
136.  Jeanne, Gems by Jeanne Marie
137.  Sandi Volpe, Sandi Volpe
138.  Laren Dee Barton, Laren Dee Designs
139.  Steph, Confessions of a Bead Hoarder
140.  Carolyn Lawson, Carolyn’s Creations

141.  B. R. Kuhlman, Mixed Mayhem
142.  Patty Miller, Cabari Beads
143.  Elizabeth Bunn, Elizabeth Beads
144.  Marianna Boylan, Pretty Shiny Things
145.  Lizzie Clarke, The Need to Bead
146.  Christina Miles, Wings ‘n’ Scales
147.  Patricia, The Color of Dreams
148.  Marde Lowe, Fancimar
149.  Ev Shelby, Raindrop Creations
150.  Sarah Small, By Salla

151.  Perri Jackson, Shaktipaj Designs
152.  Laurie Vyselaar, Lefthand Jewelry
153.  Pam Traub, Klassy Joolz
154.  Lisa Harrison, Daisy Meadow Studio
155.  Anzia Parks, Anzi-Panzi’s Work Shoppe
156.  Ingrid, Lilisgems Handcrafted Jewelry Inspirations
157.  Andra Weber, Andra’s Joyful Journey
158.  Kelly Hosford Patterson, The Traveling Side Show
159.  Adlinah Kamsir, Dreamstruck Designs
160.  Marci, That Nothing Be Wasted

161.  Kris Lanae Binsfield,  Cherish Designs
162.  Stephanie Perry, Mustard Bead
163.  Birgit Klughardt, Gites Beads
164.  Inge von Roos, Inge’s Blog
165.  Rebecca Sirevaag, Becca’s Place
166.  Sandy Markley, Gypsy Spirit Designs
167.  Elena Adams, Lena’s Beady Blog