Author Archives: Cat

Fluffy Tush!

Fluffy Tush!

Lately, I’ve been researching cloth diapers. I have found a plethora of information-an OVERLOAD in fact! They sure have come a LONG way since I last cloth-diapered!! But what an adorable, fun way to provide absolute necessary care for your little one, and yet do a part in keeping your carbon footprint just that much smaller. I mean, almost everyone uses diapers, right? At some point in time of their child’s life. Even those practicing elimination communication need some type of waste collection system for when they are traveling about or have to spend the day away from home or acceptable facilities. The last time I cloth diapered, I made my own diapers then as well. I took yards and yards of flannel fabric, cut and plied them to form a thicker absorbent padding where it was needed most, keeping the side trimmer and more custom fitted to keep baby more comfortable, and to fit better under clothes. I used simple, pull up style waterproof pants, aka “plastic pants” though they weren’t plastic-nylon maybe? Some type of thing vinyl? I’m really not sure! The entire “investment” probably cost me around $50 total for the first year. Fast forward many years, and now you can find diapers with every imaginable cartoon character on the butt, ruffles, and all sorts of printed patterns. There are “All in one” or “AIO” diapers that are just as trim and just as absorbent as national name brand disposables! There are “plastic pants” that open and close with either snaps or hook and loop tape, with some being “one size fits all” by utilizing snaps in the front to scrunch it up smaller, or unsnap to make it bigger and longer. Some have pockets you “stuff” with a “doubler” or “soaker”, and some are a combo of a thinner diaper with a pocket for stuffing when you need extra absorbancy such as overnight. I could go on and on about the intricacies and massive variety of options, but I won’t bore you any longer.

I chose microfiber terry as my absorbent part. This is one of the most important aspects of cloth diapering. If it isn’t absorbent, then what’s the use? Another main feature that I feel is very important is a layer of wicking, stay dry material. I have two options for that-microsuede, and “Minky” fabric. Both wick moisture and wetness quickly away from baby’s skin, and yet to the touch, stay relatively “dry”. In disposable diapers these days, there is an additive-a polymer called sodium polyarcrylate- that solidifies wetness into a gel of sorts and by doing so, hold wetness in the core of the diaper, preventing it from flowing back against baby’s skin. And finally, the cute outer part. I went with PUL fabric-polyurethane laminate-as it is both breathable AND waterproof! Some people think PUL isn’t a breathable fabric, and doesn’t allow for enough air to skin, but I have seen in person how it works, and feel that if baby’s bottom needs more air than that, then naked time will be scheduled. (If you’d like to see a video a mom did to investigate and compare the “breathability” of PUL versus disposables, click here: http://www.youtube.com/watch?v=IKpCcUznbaI )

First I came up with a pattern, based off a sweet little AIO diaper made and sold by a mom. Unfortunately, she has recently retired her business due to health issues, and I can no longer find Blissful Booty diapers, but if you are in the market for some, and come across an authorized retailer that still carries them, lucky you!

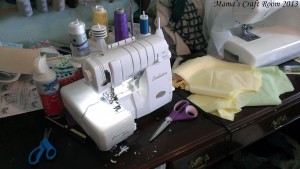
I cut out a dozen diapers. One dozen layers of microsuede, of microfiber terry, and of PUL. Then I shaped and cut out the extra inner absorbent part for down the middle-two layers per diaper of the same microfiber terry. I have a fabulous serger-the Baby Lock Evolution, and it is a work horse. I serged the edges of my microfiber terry parts, layering the soaker in a two layer separate part while I pondered assembly.

(Click on any picture to see it full-sized)
IMAG3919

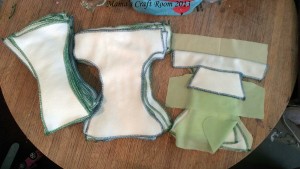
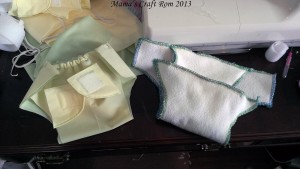
IMAG3920 Left to right- two layer soaker, extra layer of absorbent microfiber terry, and then the order I decided to assemble them-Yellow PUL outer cover, then full size microfiber terry, soaker, then microsuede wicking fabric.

I would add the tabs for the hook tape separately. I fumbled a bit at this point, experimenting with the exact method of execution of assembly. I had the order in which they were to go, but not the “what attaches to what” part down. I also wanted to add elastic inner gussets, and experimented with one microsuede liner first. It was a no-go, as I had not compensated for the fabric that would be taken up in the width of the center part of the liner, making it too narrow. I set that one aside, because I was too excited to get the first fully completed diaper done, and didn’t want to fiddle with the seam ripper at that time.

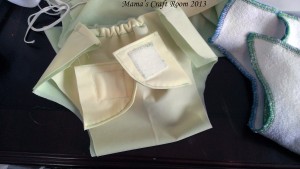
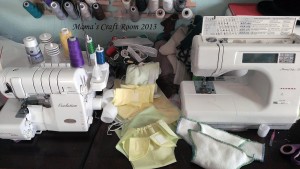
Next, I sewed the soaker to the bigger microfiber terry. That also was not helpful. I found that overall, I made the soakers and extra layer too long for the final assembly. I have to shorten them to fit between the seam allowance of the PUL and microsuede wicking layer. I then attached the PUL and the microsuede together at the very front edge and the very back, made a little casing for elastic, and secured the elastic in place. Note that the sides are all yet completely open.  Then I made the tabs that the hook tape will go on, putting one little tab of loop tape on the *outside* of one tab (for very skinny babies, so the tabs can overlap and still close securely), and sewed the loop band across the outer front.
IMAG3925 IMAG3923 IMAG3922

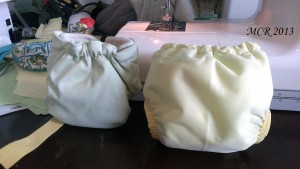
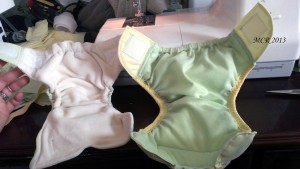
I sandwiched the tabs in the opening at the back, tucking the raw edges of the diaper part in and top stitching. Then I was ready for the fold over elastic (or FOE from here on out). I started at the edge where the added tab connects to the diaper, and brought it forward to about an inch and a half from the top front edge, stretching as I went. Then I was done! The little celery green diaper is my Blissful Booty model in newborn size that I used to make my pattern.
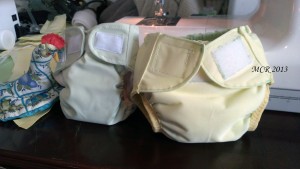
IMAG3946IMAG3949  IMAG3947

My diaper is slightly bigger-mostly in thickness, which makes it seem wider, but it really isn’t! I am very happy with it, and have now made a few more, and I have changed up my “pattern” a bit. I will share that when I get a few of the diapers made with the new pattern. I added a double gusset from the PUL fabric, as well as more leak protection by having the PUL fold over an inch into the waist band. I’m excited about it! In the meantime, here’s what I have learned:
1. Do not cut out a dozen without trying ONE first!!! I now have 10 microfiber diaper shapes that will be turned into fitted diapers (that will use a separate cover). The diaper was too bulky with the extra layer.
2. Measure twice, cut once!!
3. If not using a pattern someone else came up with, at least read their *order* of steps! It will save a lot of confusion and time in the long run.

Til next time my friends, craft on! =^..^=
 

Fiberific!

Fiberific!
Cormo_sheep

Photo courtesy of Wikipedia

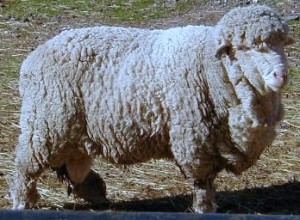
So, I’ve been spinning, spindling, and spinning some more lately. I find it so incredibly relaxing in the evenings, especially since I can’t stand sitting and watching a movie if my hands aren’t being kept busy. I feel I have made great strides with what I have and finally took the plunge in purchasing some undyed but ready-to-spin excellent quality (read: super crazy next-to-your-skin soft!) It’s from a breed of sheep called Cormo:


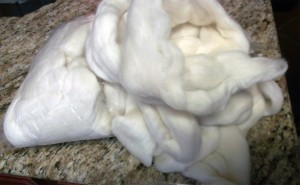
I wanted to dye it before I started spinning any of it, and hemmed and hawed until I finally broke down and picked up a range of Rit dyes to practice with. After reading tons of websites, watched a mass of youtube videos, I decided I would attempt “crock pot” dyeing. This narrowed my search down so I focused only on those sites that offered tutorials on crock pot dyeing. Since they all said basically the same thing, with a little variation here and there, I formed a step by step game plan customized to me! I pulled about three to four ounces off the one pound roll: cormotop


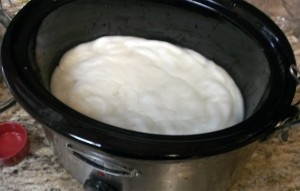
Next is where I formed my own path. Since the wool should be soaked in a water/vinegar bath, and then more vinegar is added to the mix when it’s time to add the dye, I decided to do this all in the crock pot rather than a bowl, and have to transfer the dripping wet wool to the pot. I coiled it neatly in a single layer in the pot and added just enough water to cover, and probably too much vinegar (is there such thing as too much vinegar??) about 2/3 cup to the water: vinegarsoak


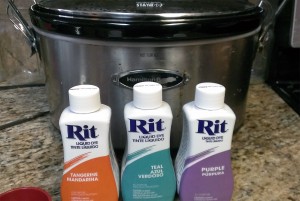
After soaking for about 45 minutes, my lovely assistant, Sweet Pea, selected three colors to use to dye the wool. She is five and a half, and has a great artistic eye and flare. So when she came up with Tangerine, Teal and Purple, I did not hesitate: selectedcolors


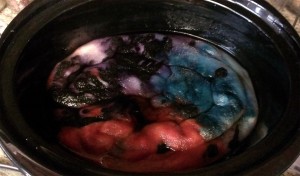
Donning gloves, I used the caps to add the dye to one third of the wool at a time. I was careful to try and make sure I added enough dye, but at the same time, I didn’t mind flecks and gaps of white where the dye didn’t touch. I just eye balled the thirds, and then splashed a little more vinegar over the three areas. I added a tab bit more water so the wool was completely immersed but not drowning: dyesadded


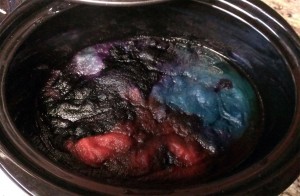
Do you see the light spots? I knew magic would happen in those little spaces. Not from experience, but rather from pure logic! I let the pot simmer for four loooooonnnnggg hours! and then I finally turned it off and allowed it to cool completely, overnight. The number one problem I read about time and again on all the greatly informative sites was to not touch it while it cools until completely cold to prevent the dreaded Felting. Indeed, this was the very last thing I wanted to happen, and I was terrified I would felt this incredibly gorgeous fleece, so I did as I was told! The next morning, when I looked into the pot, it looked like a muddy mess. Since I had read extensively, I knew not to panic and assume the worse, but I was still a bit taken back at how dark and mixed the remaining color in the pot was. Since I used Rit dye, I knew there was supposed to be quite a bit of dye left in the pot. I just didn’t like how ugly it was: cooled


But I could still see the separate colors, so I held my breath as I dumped the mess and started rinsing in cold water. I was surprised that once the first water was dumped, it ran pretty clear there after. The teal continued to need rinsing for quite some time, as is typical with blues. Finally, I wrung it all out, and it was ready to hang out to dry: wrungout


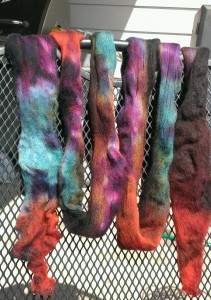
I loved the colors I saw! Since it was coiled when I added the dyes, it created a great pattern throughout the entire length. hungtodry


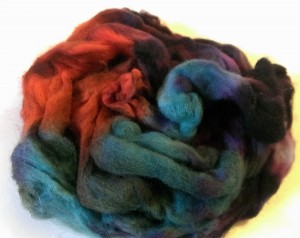
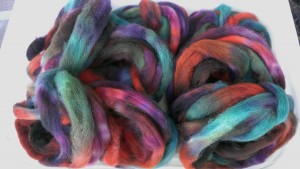
When it was completely dry (and yes, even in the Texas heat, it still took all day!) I divided it into little rolls I like to use when I spin. When I split the lengths of roving up, I got more and more excited about all the color variations in it! readytospin


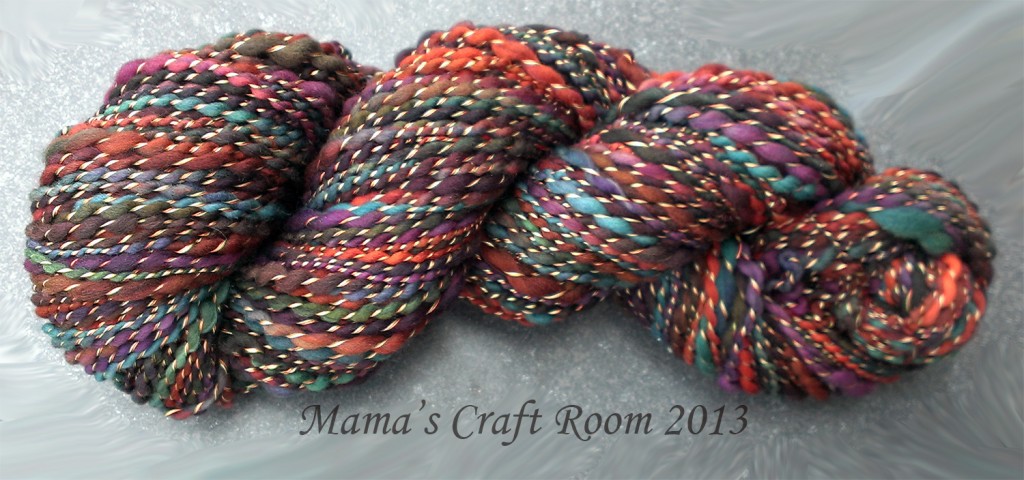
It spun up like a dream! Soon, I had two bobbins of thick and thin singles, ready to be plied. I knew I wanted this to be a very special yarn for Sweet Pea, and since the wool was already going to be a “hand wash only” no matter what it was knit into, I decided to ply it with silk thread. I found some vintage 100% silk thread on ebay that I snapped up and when it finally came in, I could not wait to get started! I was a little disappointed that it was a thinner thread, so instead of just using the one color, I used all three that I had bought. Plying with the silk thread gave the yarn a bit of a boucle’ feel and look to it. It stayed so incredibly soft, and I am so happy with the end result!! I cannot wait to get it knit up for my Sweet Pea. She watched every step of the way, and is so excited to have watched “her” yarn come to life. She paid such close attention that it won’t surprise me if my next blog post is about the yarn SHE dyes and spins herself!

valeriesyarn2

Well, til next time dear readers, keep on keepin’ on. And smile. =^..^=

No Need For An Intervention!

No Need For An Intervention!

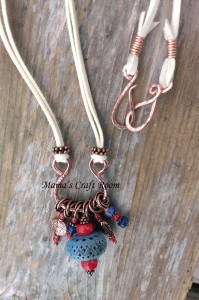
Just when my loved ones were starting to worry about me, I joined the Bead Hoarders Blog Hop, hosted by Lori Anderson of Pretty Things Blog. When Lori first came up with the idea, I thought how brilliant it was to motivate us all to start using pieces we had been hoarding for weeks, months and ahem.. years! Besides beads, ,my stash includes several (TONS) of cabochons: larger focal pieces that do not have a hole drilled through them. Technically, I suppose, they aren’t “beads”, but they are a jewelry component that I am hoarding! Leading up to this blog hop, I started forcing myself to start using them-and many beads I had been hoarding saving, with happy results. Some I have shared already with fellow jewelry artists, such as this necklace I  made, using dyed bamboo coral and copper beads, sodalite disks and a large focal bead I enameled myself, all hung from a hand forged U shape and strung into super soft leather lacing:

CoralCopperEnamelDanglesSince I LOVE LOVE the bamboo coral, I have been terribly stingy with it!! I suppose I still am, considering how little I used it, but the point is, I DID use it! I have a LOT of solid copper beads, spacers and jump rings, and since I got such a fantastic deal on them, I have been terrified of wasting them using them all up-and therefore have been avoiding using them at all. The same can be said for the sodalite rondelles-a great deal on the single strand, they are great quality, and therefore, if I use them, I won’t have any more like them-makes sense, right??


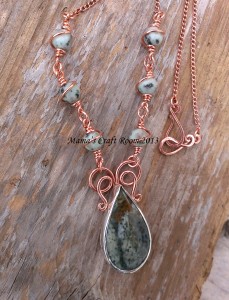
Another necklace I made was one of my first soldered bezel settings. Again, I started by choosing my focal, in this case, a cabochon I have been holding onto for awhile now, and found coordinating beads in my stash. AGAIN, these beads are some that I “got a great deal on” and therefore reluctant to “use them up”. RockyButteThe cabochon is a sweet Rocky Butte picture jasper, and I accented the necklace with sesame jasper beads I have had for YEARS. I didn’t need to use many, since I wanted the focal to stand out-nature is an amazing artist!


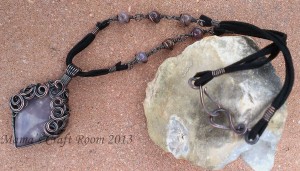
Sometimes, it’s hard to get over a ”creative block”. Writers have long claimed ownership of such blocks by dubbing them “writer’s block”. However, being on both sides of that argument since I write AND craft, I am officially changing the diagnosis to “creativity block”. I suffered this affliction in the midst of trying to force my way through my hoard treasure, and decided I would look for inspiration from some of my favorite jewelry artists, Szarka. I had always been intrigued by her style and design, and her “Kaos” wraps just boggled my mind. I selected a large cabochon-a Burro Creek agate that I LOVE the shape and color of, and sat down one day to make my way through my block. I sketched out an idea, selected my wire, and set off. After getting 80% of the wrapping done, I realized I had used wire that was too thick of a gauge to accomplish the look I wanted. With a heavy sigh, I wielded my flush cutters and with a curse, cut all the work off that I had done. I was now back to square one. I had only spent about two hours working on it so far, so no big deal, right? -_-
It was all good though, because I already had the design in mind, and that was just a practice run. I was able to use one gauge smaller, and it was just what I needed. I had it 90% done in just about an hour this time around. But then, the unthinkable happened. I asked for constructive criticism. It sat on my bench for over a week after that while I pondered what steps to take next with it. I had been so excited about it, but now I knew there was something “wrong” with it, that I was trying to NOT see until it was pointed out to me. If others could see it, then it’s real, right?? Finally, I was ready to tackle this once again. I was extremely happy with the end result. I used more leather lace, this time in black, and wrapped some sweet agate beads (yes, you guessed it, that I had been SAVING because I got a GREAT deal on them!) to use in the necklace, and my end result is my Swirly Whirly Burro Creek necklace. SwirlyWhirlyBurroCreek2


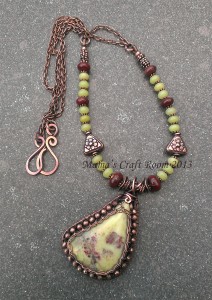
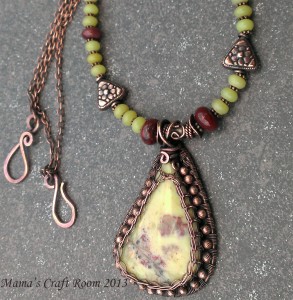
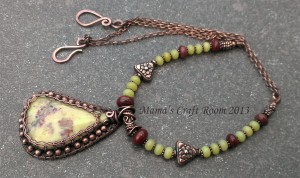
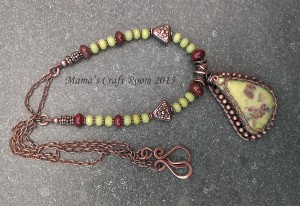
Now for the piece that I saved for my Blog Hop reveal. This cabochon is a sweet Serpentine that I snapped up in a Great Deal. To accent the cabochon, I chose little copper beads I’ve been *ahem* saving. For the necklace, out came the Great Deals once again! I selected some beads that I really haven’t had *that* long, and some I….. have. Mookaite, New Jade (aka serpentine), more copper beads and copper spacers. I am thrilled with the result!
serpentineinvk9 serpentineinvkC serpentineinvkB serpentineinvk8
First I created a viking knit bezel to hold the stone. I wanted more wire work around it, so I decided I needed to add some woven wire work. As I did that, I incorporated the little copper beads around the outer edge. I strung the necklace onto beading wire, but decided I didn’t want to add more weight, so finished it in a double strand of chain on either side. I created my own “French wire” using tiny copper coils over the beading wire where it attached to the hand made copper jump rings attaching the chains.  (If you click on the pictures, you will see them larger!) I finished it off with a hand made clasp. The yellow beads in the necklace match the base color of the cabochon perfectly, but for some reason, on the tile I used for a backdrop, it gives them a green tinge. They are actually soft yellow.

I have thoroughly enjoyed this Blog Hop! Many thanks to our hostess, Lori Anderson, and please stop by my fellow hoarders’ blogs and check out what they’ve come up with during this very therapeutic exercise:

1.  Lori Anderson, Pretty Things
2. Nancy Dale, NEDBeads
3. Roxanne Mendoza, Roxi Designs
4.  Melissa Trudinger, beadrecipes
5.  Rana Lea, Rana Lea Designs
6.  Perri Jackson, Shaktipaj Designs
7.  Rita Avila, Jewel School Friends
8.  Linda Anderson, From the Bead Board
10.  Erin Guest, Renlish11.  Joan Williams, lilruby jewelry
12. Diane Hawkey, Diane Hawkey
13.  Jo-Ann Woolverton, It’s a Beadiful Creation
14.  Sue Kennedy, SueBeads
15.  Lisa Cone, Inspired Adornments
16.  Kari Asbury, Hippie Chick Design
17.  Nichole Byers, Nichole Byers
18.  Lori Jean Poppe, Adventures in Creativity
19.  Linda Landig, Linda’s Bead Blog and Meanderings
20.  Lori Schneider, Bead Addict21.  Molly Alexander, Beautifully Broken Me
22. Cece Cormier, The Beading Yogini
23.  Niki Sayers, Silver Nik Nats
24.  Elsie Deliz-Fonseca, Eliz-Eliz and All That Craft
25.  Amber Dawn, Inventive Soul
26.  Heather Powers, Humblebeads
27.  Sarah Goode, Pookledo
28.  Monique Urquhart, A Half-Baked Notion
29.  JJ Jacobs, Coming Abstractions
30.  Cheri Reed, Creative Designs by Cheri

31.  Robyn, Museiddity
32.  Catherine King, Catherine’s Musings
33.  Jacquie, Bead Gypsy
34.  Janet McDonald, Singing Woods
35. Kay Thomerson, Kayz Kreations
36.  Tanty Sri Hartanti, TJewellicious by Tanti
37.  Hannah Rosner, Good River Valley
38.  Rochelle Brisson, A Creative Chelle
39.  Nelly May, Smelly Nelly
40.  Skylar Bre’z, Brising Beads

41.  Beti Horvath, Stringing Fool
42.  Christie Murrow, Charis Designs
43.  Leanne Loftus, First Impression Design
44.  Valerie Norton, Hot Art
45.  Judy Riggs, Rigglettes
46.  Crystal Thain, Here Bead Dragons
47.  Terry Carter,  Tapping Flamingo
48.  Sue, Mid-Life Great Expectations
49.  Nan Smith, Wired Nan
50.  Miranda Ackerley, MirandAck Arts

51.  Marie Covert, Creating Interest
52.  D’Arsie Manzella, This Here Now, Mamacita
53.  Stephanie Haussler, Pixybug Designs
54.  Lori Bergmann, Lori Bergmann Design
55.  Johanna Nunez, The Lovely One Design
56.  Mary Govaars, MLH Jewelry Designs
57.  Becky Pancake, Becky Pancake Bead Designs
58.  Alicia Marinache, All the Pretty Things
59.  Debbie Rasmussen, A Little of This, A Little of That
60.  Nat, Grubbi Ceramics

61.  Marjorie Savill Linthwaite, Bennu Bird Rising
62.  Cheryl McCloud, One Thing Leads to Another
63.  Heather Otto, The Crafthopper <<<<<<<<<<<<YOU ARE HERE!
64.  Candida Castleberry, Spun Sugar Beadworks
66.  JuLee Wolfe, The Polymer Penguin
67.  Ginger Bishop, Lil Mummy Likes
68.  Karen Mitchell, Over the Moon Design
69.  Jeannie Dukic, Jeannie’s Blog
70.  Dini Bruinsma, Angaza by Changes

71.  Birgitta Lejonklou, Create With Spirit
72.  Shalini Austin, Jewellery by Shalini
73.  Jayne Capps, Mama’s Got to Doodle
74.  Ile Ruzza, Ilenia’s Unique Beaded Jewelry
76.  Annita Wilson, AW Jewelry 
77.  Sherri Stokey, Knot Just Macrame
78.  Hannah Trost, PZ Designs
79.  Linda Inhelder, Must Haves Jewelry
80.  Miri Agassi, Beadwork

81.  Hope Smitherman, Crafty Hope
82.  Dyanne Cantrell, Dee-Liteful Jewelry Creations
83.  Susan Bowie, Susan Nelson Bowie
84.  Megan Milliken, MaeMaeMills
85.  Menka Gupta, Menka’s Jewelry
86.  Ambra Gostoli, Chic and Frog
87.  Lori Lochner, Bloghner
88.  Gerda Jurimae, Gerda’s Crafts Blog
89.  Susan, Mistheword
90.  MaryLou Holvenstot, MaryLou’s time2cre8

91.  Mary Shannon Hicks, falling into the sky
92.  Karin King, The Sparklie Things Blog
93.  Christa Murphy, Adventures of One Beady Woman
94.  Jenny Davie-Reazor, Jenny Davies-Reazor
95.  Donetta Farrington, Simply Gorgeous
96.  Mallory Hoffman, Rosebud 101 – For the Love of Beads
97.  Danielle Kelley, Imbue the Muse
98.  Kym Hunter, Kym Hunter Designs
99.  Dolores Rami, CraftyD’s Creations
100.  Marcia Dunne, 13 Alternatives

101.  Marlene Cupo, Amazing Designs
102.  Emma Todd, A Polymer Penchant
103.  Wendy Holder, Jewelry by WendyLea
104.  Michelle Escano, The Cabby Crafter
105.  Louise Glazier, Lily and Jasmine Treasures
106.  Dana Hickey, Wind Dancer Studios
107.  Lennis Carter, windbent
108.  Anne Betenson, Crystal River Beads
109.  Audrey Belanger,  Dreams of an Absolution
110.  Lisa Stukel, Carefree Jewelry by Lisa

111.  Janine Lucas, Travel Stories
112.  Claire Lockwood, Something to Do With Your Hands
113.  Kathy Engstrom, Catherine’s Dreams
114.  Paula Hisel, Simply Beadiful
115.  Karla Morgan, Texas Pepper Jams
116.  Mischelle Fanucchi, Micheladas Musings
117.  Kim, Cianci Blue
118.  Linda Sadler, Ida Louise Jewelry
119.  Karen, Spokalulu
120.  Jennifer LaVite, Dry Gulch Bead and Jewelry

121.  Andrea Glick-Zenith, ZenithJade Creations
122.  Karen Martinez, Fairies Market
123.  Robin Reed, Artistry HCBD
124.  Amy Bright, LABweorc
125.  Jasvanti Patel, Jewels by Jasvanti
126.  Tammie Everly, TTE Designs
127.  Karin Slaton, Backstory Beads
128.  Natalie Moten, Running Out of Thread
129.  Sharyl McMillian-Nelson, Sharyl’s Jewelry & Reflections
130.  Jenny Kyrlach, Wonder and Whimsy

131.  LiliKrist, Handmade by LilK
132.  Jessica Klaaren, The Truth Space
133.  Cynthia Abner, Created Treasures
134.  Beth Emery, Stories by Indigo Heart
135.  Heather Davis, Blissful Garden Beads
136.  Jeanne, Gems by Jeanne Marie
137.  Sandi Volpe, Sandi Volpe
138.  Laren Dee Barton, Laren Dee Designs
139.  Steph, Confessions of a Bead Hoarder
140.  Carolyn Lawson, Carolyn’s Creations

141.  B. R. Kuhlman, Mixed Mayhem
142.  Patty Miller, Cabari Beads
143.  Elizabeth Bunn, Elizabeth Beads
144.  Marianna Boylan, Pretty Shiny Things
145.  Lizzie Clarke, The Need to Bead
146.  Christina Miles, Wings ‘n’ Scales
147.  Patricia, The Color of Dreams
148.  Marde Lowe, Fancimar
149.  Ev Shelby, Raindrop Creations
150.  Sarah Small, By Salla

151.  Perri Jackson, Shaktipaj Designs
152.  Laurie Vyselaar, Lefthand Jewelry
153.  Pam Traub, Klassy Joolz
154.  Lisa Harrison, Daisy Meadow Studio
155.  Anzia Parks, Anzi-Panzi’s Work Shoppe
156.  Ingrid, Lilisgems Handcrafted Jewelry Inspirations
157.  Andra Weber, Andra’s Joyful Journey
158.  Kelly Hosford Patterson, The Traveling Side Show
159.  Adlinah Kamsir, Dreamstruck Designs
160.  Marci, That Nothing Be Wasted

161.  Kris Lanae Binsfield,  Cherish Designs
162.  Stephanie Perry, Mustard Bead
163.  Birgit Klughardt, Gites Beads
164.  Inge von Roos, Inge’s Blog
165.  Rebecca Sirevaag, Becca’s Place
166.  Sandy Markley, Gypsy Spirit Designs
167.  Elena Adams, Lena’s Beady Blog

BSBP #7, Final Reveal!!

BSBP #7, Final Reveal!!

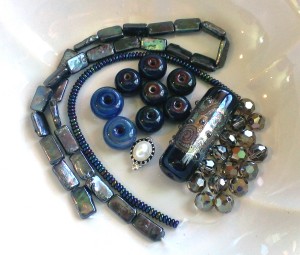
At long last, the final reveal of the biggest, best BSBP hosted by the fantastic Lori Anderson of Lori Anderson Designs! My partner for this Bead Soup Blog Party was a talented lampwork artist, Elizabeth Bunn of Elizabeth Beads. To remind you of the Soup Liz sent me, take a peak here:
mysoup

I love a challenge, and some of these pieces presented a bit of a challenge for me. I don’t typically work with much glass, as my favorite medium to work with is copper wire and stones-glass usually worries me as I’m afraid I will break it!
But Liz did a great job with a nice solid focal (I may or may not have had it fly out of my hands once.. or twice..) and the rondelles she made are absolutely delightful with little swirls of aurora borealis seen when you hold it in the right light. The accenting bead mix played off of various aspects of the focal, from the sparkly faceted Topaz Swarovskis that picked up the glittery gold shimmer in the focal, to the little peacock rondelles and the even the rectangular pearls. The trouble I had was… how to make these all work with wire.

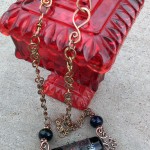
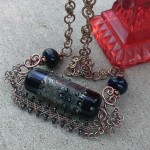
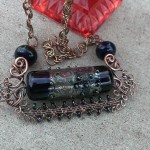
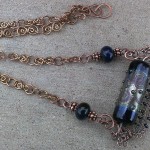
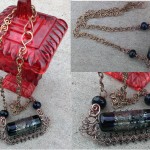
First, I spent many hours trying to decide how the focal should lay: horizontal or vertical. I wanted to present it in a way that I hadn’t really seen this type of lampwork bead used before, and as a result, I started weaving. Then, I start wrapping, and twisting, and bending wire, until I decided it was done. I added a handmade chain-my new favorite kind to make (so watch out for it on many future necklaces) as the weight of the chain was perfect proportion to the weight of the pendant. A nice LOS sauna, and I called it a day. (ok, it took weeks, as I took the wire work apart many times before I was satisfied!)
IMAG2385Untitled-2IMAG2386IMAG2388collagebsbp7

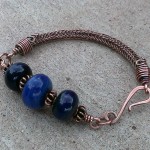
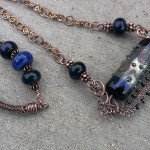
Next, I tried to design a piece around the clasp Liz sent. I don’t work in silver color much, and I really wanted to make sure I got the requirements out of the way (using the focal and clasp) first, before I let myself play with the rest of the soup. But no matter how hard I tried, Liz’s sweet little rondelles kept calling to me. You see I did use two in the necklace, but I had set the rest aside for something neat. I wanted to use them in a bracelet, so I could look down at them and lose myself in the swirls of colors they hold. As you can see, it co-ordinates very nicely with the necklace:
Untitled-1IMAG2389

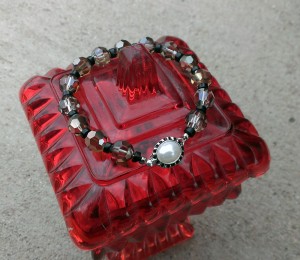
Finally, I had to use the clasp. The Topaz Swarovski crystals called as well. Since the clasp is smaller, I decided it needed to be a bracelet clasp. I thought the crystals would go well with the clasp as they were flashy and dressy. I added blackstone heishi beads, and had a cute little bracelet that would look great with a little black dress!
IMAG2381_1

I decided not to model it, because my hands do this really weird thing when I do, and the camera adds ten pounds! But I am pleased with how it turned out.

Though the final reveal was extended, I didn’t get to play more with my soup. Lots of crazy things going on around here lately, but I have them set aside, and will find ways to use them! Thank you for stopping by my blog and checking out my soup. Please head over to Liz’s blog and see what awesome things she made with the Soup I sent her! And then, kick back with a cuppa, and browse through the list of 200 participants in this final reveal! Yes, 200. Out of over 500!!
Many thanks to our gracious hostess, Lori Anderson. Lori, may you find a ray of sunshine every day that makes you smile. And to Liz, thank you for the great soup!  Until next time, my friends, bead on.  =^..^=

Adlinah Kamsir www.dreamstruckdesigns.blogspot.com
Agi Kiss http://moonsafaribeads.blogspot.com
Alenka Obid www.pepita-handmade.blogspot.com
Alison Sachs www.beadsbyearthtones.blogspot.com
Amanda Tibbetts http://www.amandamade.com/blog
Amy Sims www.amysimsdesigns.com
Ana Cravidao http://acbeads.blogspot.com
Andra Marasteanu http://bijouxdemonange.blogspot.com
Andria Poole www.Jewelleryartiste.blogspot.com
Angela Perkins http://jeweledinspirations.blogspot.com
Anja Schultz http://anjas-perlenwelt.blogspot.de/
Ann Sherwood http://ann-sherwood.blogspot.com/
Anna Nordeman http://annas-adornments.blogspot.com
Annita Wilson http://awjewelryandbeadwork.blogspot.com/
Arlene Dean http://aglassbash.blogspot.com/
Astrid Boyce http://astridboyce.blogspot.com/
Barb Fernald http://barbarasfernald.com/
Betty James Hoppensteadt www.tybetastidbits.blogspot.com
Birgit Klughardt www.gitesbeads-gite.blogspot.com
Bonnie Coursolle http://jaspersgems.blogspot.ca/
Brandy Thomason McNair www.bellavitajewelry.blogspot.com
Brenda Sigafoos http://brenda-sigafoos.blogspot.com
Carmen Lau http://littlemake.blogspot.com/
Carol Wilson http://jetadorn.blogspot.com/
Caroline Dewison http://www.blueberribeads.co.uk
Cassie Donlen www.cassiedonlen.blogspot.com
Catharine Temaluru http://ienmaginationsjewelry.wordpress.com
Catherine Turrell http://fairysketches.blogspot.co.uk
Cheri Reed www.creativedesignsbycheri.blogspot.com
Cherrie Warzocha http://colorsofshae.blogspot.com/
Christa Murphy http://adventuresofwonebeadywoman.blogspot.com/
Christina Hickman http://vintagetreasuresjewelry.blogspot.com/
Christina Stofmeel www.fengbeads.com
Christine Hansen http://intuitivesparks.blogspot.com
Christine Stonefield www.sweetgirldesign.blogspot.com
Cilla Watkins www.tellyourgirlfriends.com
Cindy Cima Edwards www.cindycima.com
Claire Lockwood www.somethingtodowithyourhands.com
Colleen Vinthagen http://www.thewireworkshop.com/blog/
Dagmar Liebisch http://kokopellidesign.blogspot.de/
Dana Fowler www.blogjunepur.blogspot.com
Danielle Kelley http://imbuethemuse.blogspot.com/
Deb Fortin www.studiok24.blogspot.ca
Dee Elgie http://cherryobsidia.blogspot.co.uk
Denise Milward http://milwardstorysofar.wordpress.com/
Diah Anggreni http://pernik-manik.blogspot.com/
Diana Gonzalez www.arteypoemas.com
Diane Valasek http://dragonflyclose.blogspot.com/
Dita Basu http://www.alankarshilpa.blogspot.com
Donetta Farrington http://simplygorgeous-donetta.blogspot.com/
Doris Stumpf http://glaszwerg.blogspot.de/
Elizabeth Bunn http://elizabethbeads.blogspot.com
Elizabeth Drake http://mutteringsofacrone.wordpress.com/
Elizabeth Jones http://www.eyekandyjewellery.com
Elizabeth Stolarczyk http://elizabethsart.blogspot.co.uk/
Ema Kilroy http://www.emakdesigns.com/blog
Erin Kenny http://beadifultherapy.blogspot.ca/
Evelyn Duberry Www.ShebaMakeda.com
Fay Wolfenden www.torchfairy.blogspot.com
Francesca Watson http://francescawatson.com/
Gen Smith http://gennysworld.blogspot.com/
Ginger Davis Allman www.thebluebottletree.com
Giorgia Rossini www.joyblonde.blogspot.com
Hannah Annear www.quirkyhannah.wordpress.com
Heather Otto http://www.thecrafthopper.com
Heidi Kingman www.Heidikingman.blogspot.com
Ildiko JaraiInge von Roos www.sviroalkotasai.blogspot.hu

http://ingetraud.wordpress.com/
Iveth Caruso www.CreativeAtelier.net
Jackie Locantore http://www.artfire.com/ext/shop/blog/MorningStarSanctuaryStudio
Jacqueline Keller www.creartelier.blogspot.com
Jane Pranata Lim http://cherryeve.blogspot.com
Jennifer Davis http://jennifersjewelsandjunk.blogspot.com/
Jennifer Tough http://jenniferbeads.blogspot.ca
Jenny Vidberg http://shymessmycken.blogspot.se/
Jessica Klaaren Http://cellardoorjewelry.blogspot.com
Joanna Matuszczyk http://filcowe.blogspot.com
Joyce Becker www.joycesjoyfulgems.blogspot.com
Judith Johnston http://www.lampworkbeadlounge.com/
Judy Riley www.threeredbeads.blogspot.com
JuLee Wolfe www.thepolymerpenguin.blogspot.com
June Butt http://www.onewhiteswan.blogspot.co.nz/
Karen Mitchell http://www.overthemoon-design.com
Kari Asbury http://hippiechickdesign.blogspot.com/
Karin King www.maverickbeads.blogspot.ca
Karin von Hoeren www.creativeideen.de
Karla Morgan http://texaspepperjams.blogspot.com/
Kathrin Lembke http://allesperle.blogspot.de/
Kathy Stemke
http://vintagememoriesjewelry.blogspot.com
Katja Benevol Gabrijelcic http://slovoni.blogspot.com
Katy Heider http://onthepondcreations.blogspot.com/
Kay Thomerson http://KayzKreationz.blogspot.com
Kelley Fogle www.mylifeonebeadatatime.blogspot.com
Keren Panthaki https://vasdea.wordpress.com
Kimberly Idalski http://www.Kimisjewelryandgifts.blogspot.com
Kirsi Loponen http://peikkonen.blogspot.com
Klaudia Tóth http://www.klaudiabizsu.hu/
Krista Quantrill www.cornucopiaofcrafts.blogspot.ca
Kristina Hahn Eleniak www.peacockandlime.wordpress.com
Kristina Johansson www.wildrosesandblackberries.blogspot.com
Laney Mead http://laney-izzybeads.blogspot.co.uk/
Lara Lutrick http://www.lutrick.blogspot.com/
Laura Guenther www.blueantiquities.blogspot.com
Lauren Potts www.lpsjewelry.blogspot.com
Laurie Vyselaar www.Lefthandjewelry.wordpress.com
Leah Tees www.mybeadylittleeyes.blogspot.ca
Lena Adams http://mommaslilbirdiesblog.blogspot.com
Lesley Watt www.thegossipinggoddess.blogspot.com
Leslie Wayment www.aabeadsonline.com/blog/
LiliKrist http://pcbylik.blogspot.com/
Linda Kropp http://lindasartbarn.blogspot.com/
Linda Newnham http://www.earth-shine.co.uk/
Linda Younkman www.lindysdesigns.blogspot.com
Lisa Boucher http://lisasclayhappenings.blogspot.com/
Lizzie Clarke www.theneedtobead.blogspot.com
Lora Bright http://labweorc.wordpress.com/
Lorelle McIntyre http://beadyart.blogspot.com.au
Lori Anderson www.PrettyThingsBlog.com
Lori Finney http://lori-finney.blogspot.ca/
Lucie Bouvier http://www.carlosbeadstore.com/blog/
Malin de Koning http://beadingbymalindekoning.blogspot.se
Marina Dobrynina http://savonfeutre.blogspot.fr/
Marina Kosovic http://machoopko-design.blogspot.com/
Marion Simmons http://www.shadetreejewelry.com/blog.html
Marita Suominen http://momentofjewelry.blogspot.fi/
Marjolein Trewavas http://roomforchangemeuk.blogspot.co.uk/
Marsela Schroth www.marselita.de
Martha Aleo www.ornamento.wordpress.com
Mary Govaars www.mlhjewelrydesigns.com
Mary K McGraw http://mkaymac.blogspot.com/
Maybeline Tay http://thejewelrylarder.blogspot.sg/
Mea-B. Uebler www.glasorakel.blogspot.com
Melissa Trudinger www.beadrecipes.wordpress.com
Menka Gupta http://menkag.blogspot.com
Merja Sundström http://suntsan.blogspot.fi/
Merja Syrjämäki http://helmiriippuvuus.blogspot.fi/
Michelle Buettner http://www.MiShelDesigns.blogspot.com
Michelle Escano www.cabbycraft.blogspot.com
Michelle Wigginton http://adornedonadelaide.blogspot.ca/
Milla Hope www.Lbcreativeart.com
Miranda AckerelyMischelle FanucchiMowse Doyle www.mirandack.comhttp://micheladasmusings.blogspot.com

http://mowsemadethis.blogspot.com/
Mrs M Makes www.mrsmmakes.wordpress.com
Nan Smith www.wirednan.blogspot.com
Natalie Davidson http://northshoredays.blogspot.co.nz/
Natalie Moten http://runningoutofthread.blogspot.com/
Natascha Marty www.sommerlicht.ch
Nikki Banham-Hall http://jewellerymakingblog.blogspot.co.uk/
Noemi Baena http://blog.noemibaena.com/
Norma Turvey http://moonlitfantaseas.blogspot.com
Pam DeBoer http://pamelas-studio.blogspot.com/
Pam Hurst www.pamhurst.blogspot.com
Patti Pruhs http://threebeadsandastring.blogspot.com/
Penny Houghton http://www.smellynelly.blogspot.com.au/
Penny Mills www.cobblestone-lane.blogspot.com
Rachel Van-Walsh www.balancedcrafts.com/blog
Rebecca Sirevaag www.godsartistinresidence.blogspot.com
Regina Santerre http://reginaswritings.blogspot.com/
Regina Wood
http://www.gina-design.blogspot.com
Roberta Fauntroy www.thevirtualbeadsociety.wordpress.com
Rosanagh WatsonRose Johnson http://ring-a-ring-a-rosie.blogspot.co.uk

http://swtrosethorn.blogspot.com
Rosemary Cheslock www.glasseyebutterfly.tumblr.com
Rossana De Gaspari http://rdegas.blogspot.com
Sabine Dittrich www.perlendschungel.blogspot.com
Sam Waghorn http://palemooncreations.tumblr.com/
Sandi James http://www.dobedobeaddo.blogspot.com/
Sandra McGriff http://skyescreativechaos.blogspot.ca
Sandra Wollberg http://city-of-brass-stories.blogspot.com/
Sandra Young http://gypsyroadbeads.blogspot.ca/
Shai Williams http://shaihasramblings.blogspot.com/
Sharon Palac www.sharonsjewelrygarden.blogspot.com
Sierra Barrett http://giraffecanhas.wordpress.com/
Silke Gröber http://just-beads.blogspot.com
Siobhán Keogh http://vovsjewellery.blogspot.ie/
Stefanie Teufel http://stefaniessammelsurium.blogspot.com
Stephanie Stamper www.Skwds.blogspot.com
Sue Hamel http://cardandjewelrycorner.blogspot.com/
Sue Rennie http://moonandsevenstars.blogspot.co.uk/
Susan Kennedy www.suebeads.blogspot.com
Susan McClelland http://mistheword12.wordpress.com
Susanna Lehto http://othellehto.blogspot.fi/
Suse Stelljes www.pearlify.blogspot.de
Susie Hibdon http://vintagesusieandwings.blogspot.com
Suzann Sladcik Wilson www.BeadphoriaBlog.com
Tara Plote http://newbiebeader.blogspot.com/
Terri G. http://terrisbloomingideas.blogspot.com/
Terry Carter http://tappingflamingo.blogspot.com/
Terry Matuszyk http://pinkchapeau.wordpress.com/
Theresa Frank http://www.theresestreasures59.blogspot.com/
Tina Bosh http://bookbug-somanybookssolittletime.blogspot.com/
Tina Noonan www.wingedimp.blogspot.com
Toltec Jewels www.JewelSchoolFriends.com
Facebook Participants
Audrey Allen https://www.facebook.com/adallen07
Cindy Wimmer Muse https://www.facebook.com/mritech813
Cynthia O’Toole https://www.facebook.com/cynthia.otoole
Deb Floros https://www.facebook.com/deb.floros
Debbie Jensen https://www.facebook.com/debbie.jensen.984
Erin Honeycutt https://www.facebook.com/erin.honeycutt1
Kaushambi Shah https://www.facebook.com/kaushambi.shah
Lisa Lloyd Harrison https://www.facebook.com/lisa.lloydharrison
Mary Jane Tanner https://www.facebook.com/mary.j.tanner
Valerie Tilghman https://www.facebook.com/valerie.tilghman

Etsy Shop Closing!

Etsy Shop Closing!

Just a quick note-I am updating my website to make it possible to make purchases, with payments through Paypal, so I am closing my Etsy shop <–(click here) for good!
To make things a little easier, I decided to offer a 20% coupon code: BYEETSY I hope you see something that catches your eye, so I don’t have to move anything over!